Finding the right face tanning drops when you have acne-prone skin can be challenging.
Many products and tanning lotions can clog pores or irritate sensitive skin, making breakouts worse.
The best face tanning drops for acne-prone skin are those labeled “non-comedogenic” and contain skin-soothing ingredients like niacinamide or hyaluronic acid while avoiding heavy oils.
Products from brands like Isle of Paradise, Tan-Luxe, and Tanologist offer formulas specifically designed for sensitive, acne-prone skin but still give your skin a healthy glow.
You don’t need to choose between a sun-kissed glow and clear skin. With the right product, you can achieve both while keeping your skin healthy and blemish-free.
Understanding Acne-Prone Skin and Tanning
Tanning drops can be tricky when you have acne-prone skin.
The right face self tanners needs to work with your skin’s unique needs without triggering breakouts or making existing issues worse.
Characteristics of Acne-Prone Skin
Acne-prone skin typically produces excess oil (sebum) which can clog pores and lead to breakouts.
Your skin may show visible comedones, including blackheads and whiteheads, especially in the T-zone area.
You might notice your skin feels oilier throughout the day, particularly if you touch your face.
Sensitivity is also common – your skin may react more strongly to products with fragrances, alcohol, or heavy oils.
Acne-prone skin often has a compromised barrier function, making it more vulnerable to irritation and environmental damage.
This means you need to be extra careful about what you apply to your face to avoid skin irritation.
Key identifiers of acne-prone skin:
Frequent breakouts
Visible pores
Shiny complexion
Rough texture from comedones
Redness and inflammation
How Tanning Products Can Affect Acne
Tanning drops can impact acne-prone skin in several ways.
Traditional formulas often contain oils and comedogenic ingredients that clog pores and worsen breakouts.
The DHA (dihydroxyacetone) in tanning products reacts with your skin’s surface proteins to create a tan.
This process can sometimes be drying, which might trigger your skin to produce more oil as compensation.
Many tanning products contain fragrance and alcohol, which can irritate sensitive, acne-prone skin.
Your skin barrier may become compromised, leading to more inflammation and potential breakouts.
Look for tanning drops labeled “non-comedogenic” or “oil-free.”
These formulations are designed not to clog pores. Water-based options typically work better than oil-based products for acne-prone skin.
Products with added skincare ingredients like niacinamide or salicylic acid can help manage acne while tanning pale skin.
Selecting the Right Tanning Drops for Acne-Prone Skin
Finding the best tanning drops that won’t trigger breakouts requires checking ingredients and testing products carefully.
Your skin deserves products that give you a glow after a tan application without causing inflammation.
Ingredients to Look for in Face Tanning Drops
When shopping for tanning drops, look for formulas with hyaluronic acid which hydrates the skin without clogging pores.
This ingredient helps maintain moisture balance while the tanning agents work.
Niacinamide is another powerful ingredient that helps control oil production and reduce redness—perfect for acne-prone skin. It works alongside tanning ingredients to improve your overall complexion.
Products containing aloe vera and vitamin E offer soothing benefits that can counteract potential irritation. These ingredients calm inflammation while providing antioxidant protection.
Avoid tanning drops with heavy oils, artificial fragrances, or alcohol.
These can strip your skin and trigger breakouts. Instead, choose water-based formulas labeled “non-comedogenic” or “oil-free.”
The best products combine DHA (the tanning agent) with skin-friendly ingredients for a natural-looking glow without irritation.
Having acne-prone skin should not stop you from getting a sun-kissed look if you choose skin-loving ingredients.
Importance of Patch Testing
Patch testing facial tanning drops is essential before applying to your entire face, especially with acne-prone skin.
To perform a patch test:
Apply a small amount behind your ear or on your inner wrist
Wait 24 hours to check for reactions
Look for redness, dry patches, itching, or new breakouts
Even products marketed for sensitive skin can cause reactions. Your skin’s response is unique, making testing crucial before full application.
If a product passes your patch test, start by mixing a small amount with your favorite moisturizer.
This dilutes the formula and helps you gauge how your skin reacts to the tanning agents and also for ease of application.
Top Recommended Face Tanning Drops
Finding face tanning drops that won’t trigger breakouts can be challenging for acne-prone skin.
These top products offer gentle formulas with skin-friendly ingredients that provide a natural glow without clogging pores or changing your skin tone to unwanted tan.
Tan-Luxe The Face drops are highly regarded for acne-prone skin due to their non-comedogenic formula.
These drops contain raspberry seed oil and aloe vera that hydrate while reducing the risk of breakouts.
You can customize your tan by adding 1-4 drops to your moisturizer. Fewer drops create a subtle glow, while more provide deeper color, having said that, know that a little bit goes a long way.
The formula is cruelty-free, lightweight, and absorbs quickly without leaving a sticky residue but with a flawless, glowing complexion.
Many users appreciate that Tan-Luxe doesn’t have the typical self-tanner smell. It comes in Light/Medium and Medium/Dark shades to suit different skin tones.
Isle of Paradise drops stand out with their color-correcting technology that creates a natural-looking tan.
The formula includes avocado oil and chia seed oil that nourishes the skin without causing breakouts.
These drops come in three shades: Peach (light), Green (medium), and Violet (dark). Each shade helps balance different skin undertones for the most flattering result.
You’ll find Isle of Paradise drops are gentle and hydrating. Mix 1-12 drops with your moisturizer depending on your desired intensity, simple steps and you can`t go wrong.
Bondi Sands Pure Sleep Mask works differently from traditional drops.
This overnight treatment develops while you sleep and contains hyaluronic acid and vitamin C to improve skin texture.
The formula is specifically designed for sensitive and acne-prone skin. It’s fragrance-free and contains no synthetic dyes that might irritate your skin.
You’ll notice a gradual tan with over 6-8 hours development time. The mask texture feels lightweight, has easy application, and absorbs quickly.
Standout features:
Fragrance-free formula
Contains anti-inflammatory ingredients
No sulfates or parabens
Sustainable packaging
Application Techniques for a Flawless Glow
Applying face tanning drops correctly makes all the difference between a patchy finish and a natural sun-kissed glow.
The right technique ensures your product works effectively with your acne-prone skin.
How to Properly Exfoliate Before Applying Tanning Drops
Start with a gentle exfoliation to remove dead skin cells. Choose a chemical exfoliant with salicylic acid, which helps clear pores while prepping your skin.
Exfoliate 24 hours before applying tanning drops, never immediately before. This timing prevents irritation and creates the smoothest canvas possible.
Focus on rougher areas like the forehead, nose, and chin where skincare products can collect. Use circular motions and don’t scrub too hard, as this can aggravate acne.
Rinse thoroughly with lukewarm water and pat dry. After exfoliating, wait for your skin to fully recover before moving on to tanning drops application.
Strategies for Even Application
Mix 2-3 drops of your tanning product with your regular moisturizer or serum. This dilution prevents the formula from being too concentrated and helps it spread evenly.
Apply the mixture using your fingertips in upward, circular motions. Start with a small amount – you can always build up color with additional applications.
For best results, pay special attention to your hairline, eyebrows, and around your nose. These areas tend to grab more product and can look darker if not blended well.
Wash your hands immediately after application. Tanning drops can stain palms and between fingers, creating a telltale sign of self-tanning product use.
Let the product fully absorb before applying makeup or sleeping. Most formulas need about 6-8 hours to develop their full color.
Tips for Contouring with Face Tanning Drops
Use concentrated tanning drops to create natural-looking contours. Apply slightly more product along the temples, under cheekbones, and jawline for dimension.
For precise application, use a small makeup brush instead of fingers. This gives you better control when creating a sculpted look.
Build your contour gradually over several days. A subtle approach looks more natural and prevents harsh lines that draw attention to acne.
For high points of your face, either skip the drops entirely or use a lighter formula. This contrast creates a radiant glow that mimics natural sun exposure.
Remember to blend thoroughly at the edges of your contoured areas. Harsh lines are the quickest way to reveal your tanning drops aren’t from real sun exposure.
Maintaining Your Tanned Complexion
A beautiful tan requires proper care to maintain its glow while keeping acne-prone skin clear.
The right balance of hydration and protection can extend your tan’s life without triggering breakouts.
Daily Skincare After Tanning
Start with gentle cleansing twice daily using non-stripping cleansers that won’t fade your tan or irritate acne.
Look for products with glycerin or hyaluronic acid to maintain moisture without clogging pores.
Hydration is crucial for tanned skin. Choose oil-free moisturizers with ingredients like aloe vera, ceramides, or niacinamide that lock in moisture while calming inflammation.
Exfoliate just once weekly with a gentle chemical exfoliant rather than harsh scrubs. This removes dead skin cells that can make your tan look patchy without triggering acne flares.
Key ingredients to look for:
Hyaluronic acid (hydrates without heaviness)
Niacinamide (regulates oil and reduces redness)
Ceramides (strengthens skin barrier)
Glycerin (attracts moisture)
Avoid products with heavy oils or fragrance that might trigger breakouts.
The Role of Sunscreen in Tanned Skin Care
Sunscreen is non-negotiable for maintaining your tan. It prevents premature fading while protecting from pigmentation issues and wrinkles.
For acne-prone skin, choose broad-spectrum SPF 30-50 with “non-comedogenic” on the label.
Gel or liquid sunscreens typically work best for oily or acne-prone skin. Look for zinc oxide formulations that offer physical protection without the heaviness of traditional sunblocks.
Reapply sunscreen every two hours when outdoors. This consistent protection prevents uneven fading and reduces risk of dark spots that are common in acne-prone skin.
Best sunscreen types for tanned, acne-prone skin:
Oil-free formulations
Zinc-based options
Water-resistant varieties for active days
Tinted versions that enhance your glow
Remember that sun exposure without protection can worsen acne scarring and create uneven pigmentation that ruins your tanned look.
Finding the right tanning drops for acne-prone skin can be confusing.
Here are answers to common questions about selecting and using face tanning products that won’t trigger breakouts.
What self-tanner products are recommended by dermatologists for acne-prone skin?
Dermatologists typically recommend water-based, oil-free formulations for acne-prone skin.
Brands like Tanologist Face + Body Drops and Isle of Paradise Self-Tanning Drops often get approval from skin specialists.
These products usually contain ingredients like hyaluronic acid and niacinamide that benefit acne-prone skin while providing a natural tan.
Many dermatologists also suggest patch testing any new product before applying it to your entire face.
Are there any non-comedogenic tanning drops suitable for sensitive, acne-prone skin?
Yes, several non-comedogenic options work well for sensitive, acne-prone skin. Brands like Drunk Elephant D-Bronzi Anti-Pollution Sunshine Drops and Tan-Luxe The Face Illuminating Self-Tan Drops are formulated to be non-comedogenic.
These products avoid pore-clogging ingredients and often include soothing elements like aloe vera and green tea extract.
Look for products specifically labeled “non-comedogenic” or “won’t clog pores” on the packaging.
Which bronzing drops are considered safe for use on skin with acne?
Bronzing drops with lightweight, water-based formulations are generally safest for acne-prone skin.
Products like Coola Organic Sunless Tan Anti-Aging Face Serum and Clarins Radiance-Plus Golden Glow Booster have gained popularity among those with acne concerns.
These safer options typically avoid heavy oils and synthetic fragrances. Many also contain antioxidants and skin-calming ingredients to support problematic skin while providing color.
What ingredients should I look for in face tanning products to avoid breakouts?
Look for ingredients like niacinamide, hyaluronic acid, and vitamin E in your tanning drops. These components hydrate and support skin health without clogging pores.
Avoid products containing heavy oils, synthetic fragrances, and alcohol denat, as these can irritate acne-prone skin.
Ingredients like salicylic acid can be beneficial, as they help control breakouts while you tan.
Can face tanning drops cause acne to worsen, and how can I prevent this?
Yes, some tanning products can worsen acne if they contain comedogenic ingredients or heavy formulations. To prevent this, always cleanse your face thoroughly before application.
Use oil-free moisturizer as a base and choose products specifically formulated for acne-prone skin.
Avoid applying tanning drops to active breakouts or irritated areas, and never sleep with the product on your face without following the manufacturer’s instructions.
How do I properly apply tanning drops on acne-prone skin to achieve an even tan?
Start with a freshly cleansed face and apply a lightweight, oil-free moisturizer. Mix 2-3 drops of tanning product with your moisturizer for more control over color intensity.
Apply the mixture evenly using gentle, upward strokes, and wash your hands immediately after application.
Avoid active breakout areas or use less product there to prevent settling in textured areas. Allow the product to fully dry before applying any additional skincare or makeup.
Now there might be some tans like St.Tropez and some other tanning mousse we did not include here, but if we did, this post will turn into a book, something we are not trying to do.
You don`t need a tanning bed, there is a face tanner for everyone. With oily skin, always opt for non-comedogenic formulas and natural ingredients when buying a facial self-tanner.
Glycolic acid and retinol are popular skincare ingredients. Many people want to know if they can combine glyccolic acid with retinol together. The answer is yes, but with caution.
You can use glycolic acid and retinol in your skincare routine, but not both at the same time.
These ingredients are powerful and can irritate your skin if used together. It’s best to use them on different days or at alternate nights.
Glycolic acid exfoliates your skin, while retinol boosts cell turnover. When used correctly, they can improve your skin’s texture and appearance.
With glycolic acid treatments, it`s advisable to start slow and watch how your skin reacts. If you notice any redness or irritation, give your skin a break.
Understanding Glycolic Acid and Retinol
Glycolic acid and retinol are two powerful skincare products. They have strong ingredients that work in different ways to improve skin texture and appearance. Let’s explore their key properties and benefits.
Properties of Glycolic Acid
Glycolic acid is an alpha hydroxy acid (AHA). It’s a small molecule that can easily get into your skin. This acid works as an exfoliant, removing dead skin cells from the surface.
Glycolic acid product can:
Make your skin smoother
Even out skin tone
Unclog pores
Boost collagen production
It’s often found in cleansers, toners, and serums. The strength can range from 5% to 30% in at-home products.
Glycolic acid works best at a low pH. This means it can make your skin more sensitive to the sun. Always use sunscreen when using glycolic acid products.
The Role of Retinol in Skincare
Retinol is a form of vitamin A. It’s known for its anti-aging effects. Retinol works deeper in the skin than glycolic acid.
Key benefits of retinol include:
Speeding up cell turnover
Boosting collagen production
Reducing fine lines and wrinkles
Improving skin tone
Retinol comes in different strengths. Start with a low concentration to avoid skin irritation. You can find it in serums, creams, and oils.
Unlike glycolic acid, retinol is not a chemical exfoliator. It works from within to promote healthier, younger, and fresher skin. Retinol can make your skin more sensitive to the sun, so use sunscreen daily.
Benefits and Risks
Combining glycolic acid and retinol can offer powerful skincare benefits, but it also comes with potential drawbacks.
Let’s explore both sides of using these ingredients together in your skincare journey.
Advantages of Combining Glycolic Acid and Retinol
Glycolic acid and retinol work well as a team to improve your skin. Glycolic acid removes dead skin cells, making it easier for retinol to penetrate deeper.
This combo can help reduce fine lines, wrinkles, and other signs of aging more effectively. It also improves your skin tone and texture resulting in clear skin.
The pair are powerhouse ingredients that can be great for acne-prone skin.
Glycolic acid unclogs pores, while retinol helps control oil production. Together, they can lead to clearer skin with fewer breakouts.
For those dealing with oily skin types, hyperpigmentation or dark spots, this duo can be a game-changer.
Glycolic acid fades discoloration, and retinol speeds up cell turnover. This can result in a more even skin tone over time.
Potential Side Effects
While the benefits are appealing, there are risks to consider. Your skin might become dry, red, or irritated when using both products. This is more likely if you have sensitive skin.
You may experience increased sun sensitivity. This makes it crucial to use sunscreen daily to protect your skin from damage.
Some people might face temporary breakouts or skin purging when starting this routine. It’s your skin adjusting to the increased cell turnover.
In rare cases, you could develop a rash or severe irritation. If this happens, stop using the products and talk to a dermatologist.
To minimize side effects, start slowly. Use each product on different nights or at lower concentrations. This lets your skin adjust gradually to the powerful combination.
Application Techniques
Proper application of glycolic acid and retinol can maximize benefits while minimizing irritation. Follow these tips to use both ingredients safely and effectively in your skincare routine.
Optimal Skincare Routine
Start by cleansing your face with a gentle cleanser. Pat your skin dry and wait a few minutes before applying products.
Apply glycolic acid first, as it works best on clean skin. Use a toner or serum with glycolic acid, spreading a thin layer over your face and neck.
Wait 20-30 minutes to let the glycolic acid absorb. This helps prevent interactions between products. Next, apply your retinol product.
Use a pea-sized amount for your whole face. Gently pat it onto your skin, avoiding the eye area.
Finish with a moisturizer to lock in hydration. Look for one with soothing ingredients like ceramides or niacinamide. These can help combat dryness from the active ingredients.
Preventing and Managing Irritation
Start slow when using glycolic acid and retinol together. Use each product 1-2 times a week at first.
Gradually increase frequency as your skin adjusts. Don’t use them on the same night at first.
Do a patch test before using new products. Apply a small amount to your inner arm and wait 24 hours. This helps check for allergic reactions.
If you notice redness or flaking, take a break for a few days. Scale back usage until your skin recovers. Add extra hydration with a gentle, fragrance-free moisturizer.
Use sunscreen daily. Both glycolic acid and retinol can make skin more sun-sensitive. Choose a broad-spectrum SPF 30 or higher for protection.
Complementing Products and Alternatives
Proper skincare routines often include multiple products that work together. Using the right combinations can boost results and protect your skin.
Sunscreen is crucial when using glycolic acid or retinol. The ingredients in chemical peels can make your skin more sensitive to UV rays.
Apply a broad-spectrum SPF 30 or higher daily, even on cloudy days.
Choose a moisturizer with ceramides to support your skin barrier. Hyaluronic acid can help keep your skin hydrated. Look for products that combine SPF and moisturizing ingredients for easy application.
Vitamin C is a great daytime partner for nighttime retinol use. It’s an antioxidant that fights free radicals and boosts collagen production for youthful-looking skin.
Niacinamide can help reduce irritation from retinoids. It also improves skin texture and tone.
Beta hydroxy acid (BHA) can be used on alternating nights with retinol. BHA clears pores and fights acne. Start with low concentrations and gradually increase usage to avoid irritation.
Using glycolic acid and retinol on sensitive skin
If you have sensitive skin, you need to be careful when using glycolic acid and retinol. These ingredients can be harsh and may cause irritation.
For best results start by using each product separately. Try glycolic acid once a week, then slowly increase to 2-3 times a week if your skin tolerates it well.
For retinol, begin with a low concentration (0.01% – 0.03%). Apply it every third night at first. Gradually work up to nightly use over several weeks or months.
Always do a patch test before using new products on your face and skin. Apply a small amount to your inner arm and wait 24 hours to check for reactions.
Use these products at night and always apply sunscreen during the day. Sun protection is crucial when using glycolic acid or retinol.
Here are some tips for using these products safely:
Apply a moisturizer before retinol to reduce irritation
Wait 30 minutes after cleansing before applying glycolic acid
Don’t use both products on the same night
Stop use if you experience redness, peeling, or stinging
Remember, less is more for sensitive skin. Go slow and listen to your skin’s needs.
Conclusions and Best Practices
Using glycolic acid and retinol together can be tricky. It’s best to apply them at different times. Use glycolic acid in the morning and leave the retinol for your evening routine. This helps avoid irritation.
Start slow when combining these ingredients. Use each product 2-3 times a week at first. Gradually increase as your skin adjusts. Always wear sunscreen during the day.
Here are some key tips:
• Don’t mix glycolic acid and retinol in the same application • Wait 30 minutes between using each product • Use a gentle cleanser and moisturizer • Stop if you notice redness or peeling
Benefits of proper use:
Smoother skin texture
appearance of wrinkles are reduced
Brighter complexion
Reduced appearance of fine lines
More even skin tone
Listen to your skin. Everyone’s skin is different with varying cellular turnover. You may need to adjust how often you use these products. Be patient – it can take weeks to see results.
Frequently Asked Questions
Combining glycolic acid and retinol in a skincare routine raises some common questions. Here are answers to help you use these ingredients safely and effectively and minimize any skin concerns.
Is it safe to use glycolic acid and retinol products in the same skincare routine?
You can use glycolic acid and retinol together, but it’s best to space them out. Apply glycolic acid in the morning and retinol at night.
This helps avoid irritation and allows each ingredient to work well.
Can glycolic acid be applied in the morning if retinol is used at night?
Yes, you can use glycolic acid in the morning if you use retinol at night. This approach lets you get the benefits of both without mixing them directly.
Remember to use sunscreen during the day when using these active ingredients.
How should glycolic acid be incorporated into a skincare routine that includes retinol and niacinamide?
Start by using glycolic acid once or twice a week in the morning. Use retinol at night on different days.
You can apply niacinamide after either product. Slowly increase use as your skin adjusts.
Always check for any signs of irritation.This should be standard practice when using any new skincare product by doing patch testing.
Are there any risks associated with using glycolic acid before applying retinol?
Using glycolic acid right before retinol can increase skin sensitivity or cause potential irritation.
It may lead to redness, dryness, or peeling. To avoid this, use glycolic acid in the morning and retinol at night.
Or, wait 30 minutes between applications if using both at night.
What are the potential effects of combining glycolic acid with tretinoin?
Combining glycolic acid with tretinoin can cause more skin irritation than using either alone. It may lead to dryness, redness, and flaking.
If you want to use both, start slowly and on different days. Talk to a doctor or skin expert for personalized advice.
What ingredients should be avoided when using glycolic acid or retinol in a skincare regimen?
Avoid using other strong exfoliants like salicylic acid or benzoyl peroxide when using glycolic acid or retinol.
Skip products with alcohol, which can dry out your skin or result in uneven skin tone or dull skin.
Be careful with vitamin C, as it may not mix well with these ingredients. Stick to gentle, non-irritating skin care products in your routine to avoid skin discoloration and uneven texture.
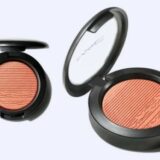
Finding the right blush for olive skin can be tricky. Your unique undertones need a blush that enhances your natural glow without looking ashy or orange.
Mac Cosmetics offers several great options for olive complexions. Their Powder Blush in Melba or Gingerly gives a subtle warmth that complements olive skin beautifully with a warm undertone.
These shades blend seamlessly and create a natural-looking flush.
These buildable formulas let you control the intensity while adding a healthy radiance to your cheeks.
Pick the shade that works best with your specific olive undertones for a healthy-looking glow and a flawless finish.
Understanding Olive Skin Tones
Olive skin has a mix of golden and green undertones. Choosing the right blush shade can enhance your natural glow and complement your unique coloring with a natural complexion.
Identifying Your Skin Undertone
Your skin undertone test is easy, look at the veins on your wrist. If they appear green, you likely have warm undertones. Blue veins suggest cool undertones. A mix of both points to neutral undertones.
Try on gold and silver jewelry. Gold looks best on warm undertones, while silver flatters cool tones. If both look good, you’re neutral.
Check your skin’s reaction to sun exposure. Warm undertones tend to tan easily, while cool undertones burn more quickly.Knowing your skin undertone helps you find the perfect neutral shade.
Best MAC Blush Shades for Olive Skin
MAC offers several blush shades that work well with olive skin tones:
Cool undertones: Opt for Breath of Plum (soft plum) or Dame (pink with plum undertones)
Neutral undertones: Go for Blushbaby (beige pink) or Harmony (muted rose-beige brown)
These shades blend seamlessly with olive skin, adding a natural-looking flush. Start with a light hand and build up the color as needed for your desired look.As with any makeup product, less is more, aim for a natural-looking color.
Top MAC Blush Picks for Olive Skin
MAC offers several blush options that work well for olive skin tones.
These picks enhance your natural glow and add a pop of color to your cheeks a good blush should give you a hint of color without leaving you looking like a clown.
Customer Favorites
MAC Gingerly Blush is a top choice for olive skin and makeup artists top choice. This matte powder blush has a warm peachy-brown tone that looks natural. It blends easily and gives your cheeks a soft flush and a satin finish.
MAC Peachykeen Blush is another fan favorite. This shimmery blush has a peachy-pink color that adds warmth to olive complexions. It gives your skin a healthy glow without looking too bright. A must-have for those looking for rosy pinks for special occasions.
For a bolder look, try MAC Pink Swoon Blush. This bright pink shade can seem scary at first. But when applied lightly, it gives olive skin a pretty pop of color more in a coral pink.
MAC Extra Dimension Blush in Hushed Tone is great for olive skin. This beautiful blush has a creamy powder texture that’s easy to apply. The soft pink-bronze color adds warmth and dimension to your cheeks.
Glow Play Blush in Grand is perfect for a natural look. This bouncy cream blush melts into your skin. The soft terracotta shade complements olive tones beautifully giving you a natural-looking glow.
For a matte option, try MAC Blush in Melba. This peachy-coral color brightens olive skin without looking too pink or orange. It’s easy to build up for more color as needed to achieve the right right blush color.
Types of MAC Blushes
MAC offers a range of blush formulas to suit different preferences and skin types. You’ll find shades of blush from classic powders to creamy and liquid formulations.
Powder Blush Varieties
MAC’s powder blushes come in several finishes. Sheertone blushes give a natural flush with buildable color. Matte blushes provide a velvety finish without shimmer. Satin blushes offer a soft sheen.
For olive skin, shades like Melba (matte peach) or Gingerly (sheertone golden coral) work well. Powder blushes are easy to apply and blend. They’re great for oily skin types.
You can use a fluffy brush for a diffused look. For more intensity, use a denser brush. Start with a light hand and build up color as needed.
MAC’s cream blushes give a dewy finish that’s perfect for dry or mature skin. The Glow Play Blush has a bouncy texture that melts into the skin to give you a perfect blush shade. It comes in shades like Grand (warm terracotta) that flatter olive tones.
Liquid blushes like the Versicolour Stain offer long-lasting color. They’re highly pigmented, so start with a small amount.
Blend quickly with your fingers or a stippling brush.
These formulas are great for a natural, “skin-like” finish. They work well over or under the foundation.
MAC’s Extra Dimension blushes have a unique gel-powder formula. They give a luminous finish with buildable color. Try shades like Hard to Get (warm brown) for olive skin.
Mineralize blushes contain baked minerals for a soft, radiant glow. They’re good for dry skin and give a subtle shimmer.
The limited edition collections often feature unique blush formulas. These might include duos, highlighting blushes, or special finishes.
For a multi-use product, try the Cream Colour Base. It can be used on cheeks, lips, and eyes for a monochromatic look.
Choosing the Right Blush Shade
Picking the perfect blush for olive skin can boost your makeup look. The right shade will make your cheeks glow and your complexion shine.
Blushes for Different Olive Skin Tones
For light olive skin, try MAC Melba or Peaches. These peachy-pink shades add a soft flush. MAC Gingerly works well for medium olive tones. It’s a warm brownish-coral that looks natural.
Dark olive skin pairs nicely with MAC Coppertone or Mocha. These deeper shades give a rich, sun-kissed look.
MAC Blushbaby is great for all olive skin tones. It’s a neutral pink that blends easily in darker skin tones.
Remember to apply blush lightly. You can always add more if needed after the first blush. Blend well for a smooth finish.
Blush Colors and Skin Type Compatibility
Your skin type matters when picking blush. For dry skin, cream blushes like MAC Glow Play Blush work best. They add moisture and blend smoothly.
Oily skin types should opt for powder blushes. MAC Powder Blush in Pinch Me or Fleur Power stays put all day.
If you have combo skin, try both types to see what works.
For sensitive skin, look for blushes without added fragrances. MAC’s Sheertone Blush line is gentle on skin. Always test new products on a small area first to get a perfect match .
Application Techniques for Olive Skin
Applying blush to olive skin requires careful color selection and technique to enhance your natural glow.
The right approach with popular mac blushes gives you a fresh, radiant look that complements your skin tone.
Mac mineralize blush
A blush that builds lightly, layer after layer, without heavy coverage.
The lightweight blush formula glides onto the skin to achieve luminous color without being heavy on your skin.
It has the best blush shades for anyone looking for a soft texture and a bare skin finish but without yellow undertones.
Achieving a Natural Finish
Start with a light hand when applying blush to olive skin. Use a fluffy brush to pick up a small amount of product.
Smile and sweep the brush along your cheekbones, blending outward.
For a natural finish, try MAC Breath of Plum or Well Dressed.
These shades give a subtle flush that looks like you’re glowing from within.
Build up the color slowly, adding thin layers until you reach your desired intensity.
This method prevents overdoing it and keeps the look fresh with a bare-skin look.
To add dimension, lightly dust a golden shimmer like MAC Trace Gold on the highest points of your cheeks.
This creates a sun-kissed effect that suits olive skin beautifully something you only get with mac sheertone blush.
Building and Blending Pigmented Blush
For a bolder look, choose a more pigmented blush for your olive skin tone. Apply it with a dense brush for better control. Tap off excess product before touching your face to avoid applying too much.
Start at the apples of your cheeks and blend upward and outward. Use circular motions to work the color into your skin. This technique ensures an even application with no harsh lines even on lighter skin tones.
If you apply too much, don’t panic. Use a clean brush or sponge to soften the edges.
You can also pat some face powder over the blush to tone it down. Remember, it’s easier to add more than to take away.
For evening looks, layer a satin-finish blush over a matte one. This adds depth,sheer tone and creates a multi-dimensional effect that catches the light beautifully on olive skin.
Mac mineralized blush works well on fair skin tones,but that`s not here or now, we are looking at olive skin and dark skin tones.
But when you check here,you`ll find the best Mac blushes to give you that perfect shade for an unrivalled matte finish they have a selection of the best blushes.
I hope this best mac blush for olive skin post will help you find the right shade of blush to give you that deeper shade or the medium skin tone you are looking to achieve.
Remember the perfect mac blush does not nessesarily fir every one,find what works for your skin tone.
When preparing for Halloween, your manicure plays a crucial role in completing your festive look.
The “59 Best Orange and Black Nail Designs For Halloween” will provide you with top-tier inspiration to make your nails stand out.
Orange and black nail art not only captures the spooky essence of the season but also adds a fun and stylish twist to your overall appearance.
From classic pumpkin designs to intricate spiderwebs, the options for Halloween-themed nail art are virtually limitless.
You’ll discover everything from simple yet striking patterns to more detailed and elaborate designs.
No matter your skill level, there are ideas in this list that will suit you perfectly.
Whether you’re attending a Halloween party or just want to get into the festive halloween spirit, having the right manicure can make all the difference.
Dive into this curated list to find your perfect Halloween nail design and make a strong statement this season!
The Allure of Halloween Nail Art
Halloween nails capture the spirit of the spooky season, offering creative and unique designs that stand out. With the holiday approaching, you can experiment with various patterns and themes.
Bold colors like black and orange dominate Halloween nail designs this year as in most years. They create striking contrasts and embody the essence of the holiday.
Pumpkins, ghosts, and spider webs are popular motifs that can transform your nails into mini canvases of Halloween art.
You can mix and match glitter, matte, and glossy finishes to add depth to your Halloween monster nails. These different textures elevate the overall design.
Stickers and stencils are readily available tools for you to create cute Halloween nail art and achieve these intricate looks without needing exceptional nail art skills.
By incorporating rhinestones and metallic accents, you can add a touch of glamour to your spooky-themed nails. These elements make the designs pop even more.
Halloween nail art not only expresses your festive spirit but also allows you to showcase your personal style in a fun way. Engaging in this creativity can be a fun aspect of the spooky season.
Key Trends in 2023 for Halloween Manicures
As Halloween approaches, nail designs are becoming more eye-catching, with bold colors, intricate patterns, and reimagined classic symbols taking center stage.
Metallic and glitter accents also play a significant role, offering a touch of glamour to spooky themes and everywhere you look, halloween nail art designs are there to greet you.
Bold and Bright Designs
This year, bright orange and stark black dominate the Halloween nail scene. You see bold, solid colors paired with neon accents for a striking effect.
Pumpkins and witch hats are among the popular choices for these vivid designs. Combining bright tones with minimalistic art helps nails stand out even more.
A trend you’ll notice is the use of bold, schematic designs that instantly draw attention.
Intricate Patterns and Textures
Intricate detailing has taken over Halloween manicures. Expect to see patterns like spider webs, lace, and bat silhouettes etched across nails.
Textured finishes, such as matte topcoats and 3D embellishments, make these designs pop.
Intricate brushwork ensures each nail serves as a tiny masterpiece, offering a complexity that elevates your Halloween dark nails look to new heights.
Classic Halloween Symbols Reimagined
Classic Halloween symbols get a modern twist this year. Pumpkins, ghosts, and witches are reinterpreted through elegant lines and contemporary designs.
Think of a minimalist witch hat outlined in black or a sleek bat silhouette combined with geometric shapes.
This reimagining keeps the traditional Halloween spirit alive but adds an element of novelty and sophistication.
Metallic and Glitter Accents
Glitter accentsand metallic provide the final touch to many Halloween manicures.
Metallic stars and glistening tips add a sparkle that captures the light, making your nails shimmer.
Glitter polishes in orange and black hues are often used to enhance various designs, from simple shimmery base color to full-on glitter gradients.
This trend ensures your Halloween nails glow with an eerie yet glamorous flair.
Technique and Style
When it comes to achieving the perfect Halloween nail look, it’s all about combining unique techniques with stylish designs.
Let’s explore different approaches that will elevate your manicure for the spooky season.
Sophisticated French Tips with a Twist
Transform the classic French tips by incorporating Halloween colors and themes. Instead of the typical white tips, opt for orange and black.
Combine these with intricate details like spider webs, pumpkins, or bats on the tips.
To maintain sophistication, keep the base a translucent nude or soft pink. This provides a clean backdrop for your designs, ensuring they stand out without overwhelming the look.
Use fine brushes for precision and create smooth, clean lines.
Negative Space Manicures
Negative space manicures allow part of the natural nail to remain visible, creating a modern and sophisticated look.
Use black and orange polish to create geometric shapes, stripes, or even Halloween-themed silhouettes like witches’ hats or ghostly figures.
This approach not only gives your nails a chic appearance but also adds depth to your design. Applying a glossy topcoat will enhance this effect, making the colors pop against the natural nail.
Abstract Nail Art
For a more contemporary twist, abstract nail art combines randomness with creativity. Use splatters of orange and black, incorporating other hues like metallics to add dimension.
Play with shapes and patterns that embrace an asymmetrical aesthetic. Think swirling lines, dots, and streaks that don’t follow a predictable pattern.
This technique is perfect for those who enjoy a more artistic and less structured look. Use tools like dotting pens and fine brushes to achieve this style.
Long Nails and Clean Lines
Long nails provide a larger canvas, making them ideal for detailed Halloween designs. Achieve clean lines and intricate patterns by using striping tapes and stencils.
Emphasize sleek designs like pointed tips or coffin shapes that add drama. Combining sharp black lines with vibrant orange elements can create striking contrasts.
How about orange manicure if you want nothing fussy.
To maintain clarity and sophistication, ensure that your colors are well-defined and that each line and shape is precise.
Thematic Nail Art
Celebrate Halloween with nail designs that reflect iconic characters, spooky scenarios, and autumnal motifs.
Each theme offers unique ways to bring the spirit of Halloween to your fingertips.Plain black halloween nails will be just as brilliant if you can be bothered with pumpkin nail art.
Iconic Halloween Characters
Bring classic Halloween figures to life on your nails. Frankenstein faces, vampires with fangs, witches on broomsticks, and skeletons are among the most popular choices.
Use bold colors like black, green, and red to highlight these designs.
Ghosts with eerie expressions can float across your nails, adding a spectral touch.
Consider alternating characters on different nails for a varied but cohesive look. A mix of detailed artwork and simpler silhouettes can create visual interest without overpowering each other.
Spooky Scenarios
Scary scenes can transform your nails into tiny canvases of fright. Haunted houses with bats flying overhead, jack-o’-lanterns glowing eerily, and dark forests filled with lurking shadows are perfect for this category.
For an extra touch, add peach or orange backgrounds to set a nighttime scene. Incorporate tiny details like cobwebs and spiders to enhance the spooky atmosphere. This is where creativity shines, turning each nail into a storytelling element.
Autumnal Motifs
Embrace the season with motifs like pumpkins, fallen leaves, and warm colors and playful ghosts.
Whether you prefer rich oranges, deep reds, or earthy tones, these colors capture the essence of autumn even on short nails. Pair these with black to keep the Halloween spirit alive.
Pumpkins can be styled traditionally or given sinister faces for a jack-o’-lantern effect. Simple leaf patterns can also bring an elegant nod to the fall season.
Incorporate gold or glitter for a touch of glam without losing the autumn vibe.
These designs not only celebrate Halloween but also the beauty of the fall season, making your nails a versatile accessory for the entire autumn period.
The right mix of patterns and colors can create a stylish and festive look that lasts.
Color Palettes and Combinations
Choosing the perfect nail design for Halloween involves experimenting with various color palettes and combinations.
Orange and black are classic choices, but a variety of schemes and subtle combinations can provide unique and stylish looks.
Classic Orange and Black Elegance
Classic orange and black designs are timeless for Halloween. Orange nails can range from bright pumpkin shades to darker, burnt tones.
Black provides a perfect contrast. An elegant look can be achieved by alternating orange and black nails or incorporating black tips on orange nails.
Consider using glitter or matte finishes to add a different texture. Black lace designs over orange nails create a sophisticated appearance.
Simple stripes or polka dots also add a playful touch. Keeping the designs symmetrical helps maintain an elegant look.
Bold Contrasts and Color Schemes
Bold contrasts highlight the uniqueness of each color. Mixing neon orange with jet black can create a striking effect.
You can try geometric patterns or gradients for a modern twist. A key here is ensuring each color stands out sharply against the other.
Using metallic accents like gold or silver can add depth to the bold contrasts. Some people use stencils to create intricate designs that combine orange and black in unusual ways.
Bold designs can range from simple to highly detailed, depending on your preference.
Understated and Natural
Understated nail designs focus on subtlety and simplicity. A natural palette might include soft oranges or peachy tones mixed with muted blacks.
This approach suits those who prefer a more subdued Halloween look. Minimalist designs, such as thin lines or delicate dots, add refinement.
These designs often incorporate transparent bases with touches of color. Natural nails can also be enhanced with nude tones that slightly hint at orange or black.
Keeping it simple with bare nails accented by a single color tip can be both chic and festive.
Enhancing Details and Accents
Adding specific nail details and accents can elevate your Halloween nail designs, making them more eye-catching and festive especially if you are visiting themed parties.
Consider using nail stickers, drip tips, and celestial touches to create unique and spooky designs for your Halloween fun.
Nail Stickers and Adornments
Nail stickers are an easy way to add intricate details without the need for steady hands.
Halloween-themed stickers like pumpkins, spiders, and bats can bring your orange and black nails to life.
Using metallic adornments can also provide a dramatic flair. Stickers with glitter or holographic effects can offer an extra level of shine, cute nails and mystery all without having a professionally done manicure.
Mix and match various stickers and adornments to decorate each nail differently, keeping the overall theme consistent.
Drip Tips and Edgy Patterns
Drip tips add an eerie, melting effect to your nails, perfect for a spooky Halloween vibe. Use a contrasting black or white polish to create these drip patterns over an orange base, but you can still go for orange nail polish.Halloween isthe time to let loose.
Consider plaid-like grids for a more edgy look. This pattern can be created using thin black lines over an orange background.
Combining drip tips with plaid patterns can result in a bold and avant-garde design.
Starry and Celestial Touches
Starry and celestial touches can add a magical element to your Halloween nails. Paint tiny stars and moons using a fine brush or utilize starry sky stickers for precision.
A starry sky effect can be achieved by sponging gradients of blue and black onto the nails and adding small white dots for stars.
Mix in a few star-shaped or moon-shaped stickers to complete the look. This celestial theming can add an ethereal aura to your Halloween nail designs.
Halloween nail ideas are so easy to achieve once you have press on nail stickers which you can buy affordably from Amazon.
Seasonal Nail Art Dynamics
Black nail designs or orange Halloween nails capture the essence of Halloween. From transitioning colors to festive patterns and the ambiance of the night, each design brings out the spirit of fall.
Transition from Summer to Fall
As the seasons change, so do the colors and patterns in nail art. Bright summer hues give way to richer, more muted shades like burnt orange and deep black.
This transition marks a shift from light-hearted designs to more thematic concepts aligned with fall.
Fall nail designs incorporate elements like leaves and pumpkins, blending vibrant tones with darker accents.
This creates visually appealing manicures and spooky nail design perfect for the season.
Candy Corn and Other Delights
Nothing says Halloween quite like candy corn. Candy corn nails can be a playful addition to your seasonal look.
Using stripes of orange, yellow, and white, you can create a design that mirrors this classic treat.
Candy corn is synonymous with trick or treating, making it a nostalgic and fun choice. Other playful designs can include spider webs or ghostly motifs,time of year and all in the spirit of the holiday.
The Romanticism of Halloween Night
Halloween night carries a unique, romanticized air that can translate beautifully into nail art.
Dark skies, twinkling stars, and the eerie allure of the night can inspire designs that evoke the mystery and charm of Halloween.
Black polish with subtle sparkles can mimic a starry sky. You can also add tiny bat or moon decals for a touch of whimsy.
This approach adds an elegant and slightly dramatic flair to your fun Halloween-themed nails.
Preparing for the Celebration
Getting ready for Halloween involves more than just choosing your costume.
To create a cohesive look, consider how your nails can complement your costume, match your makeup, and make a bold statement.
Complementing Your Costume
Choosing nail designs that enhance your Halloween costume can elevate your entire look, but you don`t have to visit a professional nail artist just get stickers or press on nails from Amazon and you are ready to go.
If you’re dressing up as a witch, consider dark, mystical colors with intricate details like spiderwebs or moons.
For a pumpkin or jack-o’-lantern-themed costume, orange nails with black accents can tie everything together.
Animal-themed costumes, like tigers or bats, can be highlighted with corresponding prints and color schemes on your nails.
Your makeup look and nails should work together for a unified appearance.
For goth or vampire costumes, deep reds and blacks in both makeup and nail polish can create a dramatic effect.
If you’re opting for a whimsical fairy or mermaid costume, pastel oranges and blacks with glitter or iridescent finishes can add a magical touch.
Smoky eyes paired with matte black nails can make your overall Halloween look striking and memorable.
Making a Statement with Your Nails
Nail art can serve as a conversation starter at any Halloween event. Bold designs such as 3D embellishments, glow-in-the-dark polish, or intricate hand-painted scenes can make your nails a standout feature.
Choose elements like metallic accents or textured finishes to add depth and interest. Even simple touches like glitter topcoats can transform a basic black or orange polish into something eye-catching.
Remember, your nails are an extension of your costume and makeup, so don’t hesitate to go all out.
Expert Tips from Professional Nail Artists
Nail artists emphasize the importance of starting with a clean, well-prepped nail surface. Removing any old polish and filing your nails to your desired shape provides a strong foundation.
Tip: Using a good quality base coat helps prevent nail stains and prolongs the life of your manicure.
When working with intricate orange and black designs, patience is key.
Consider investing in fine-detail brushes for precision. These tools allow for cleaner lines and sharper details, enhancing the spooky spirit of your Halloween nails.
Tip: Practicing your design on a piece of paper before painting on your nails can be very helpful.
Professional nail artists recommend using gel polish for its long-lasting and chip-resistant properties.
Gel allows your nails to maintain their sophisticated look through the entire Halloween celebration.
To add an extra touch of flair, don’t shy away from embellishments like rhinestones or glitter. These elements can elevate your design and draw more attention to your nails.
Tip: If you’re new to nail art, start with simpler designs and gradually work your way up to more complex patterns.
It helps to start with red color or red tips as these are quicker to notice mistakes, Nude polish just hides things. Remember you are creating a creepy design so it`s ok if things don`t look perfect.
You can do your nails then decide to look beautiful without makeup for the rest of your body following these tips.
Another essential aspect is the top coat. Nail artists suggest applying two layers of a high-quality top coat to seal in your design and add a glossy finish.
Maintaining your nails with cuticle oil keeps them healthy and nourished, contributing to the longevity of your nail color.
It’s a given that everyone has their own opinion on what they think is “right” for their skincare.
However, there are some mistakes many people make with skincare and how it applies in everyday life, this can be easily avoided by following these simple rules to achieve beautiful skin:
There are many different types of skincare products out on the market today. Especially for acne-prone skin and other skin issues.
However, some people may not know that certain ingredients can be harmful or cause an allergic reaction if applied incorrectly or some products that can cause skin irritation especially on sensitive skin.
This could lead to inflammation in your skin. Don’t let these common mistakes happen.
Your skin is the most important organ for and protecting your internal organs, so you want a healthy skin on any given day. The care of your skin begins with knowing the right products to use.
Unhealthy, improper care can lead to concerns like acne and premature wrinkles.
Skipping SPF
The sun is a beautiful and powerful force, but it also has consequences such as sun damage.
Exposure to UV rays can lead you early signs of aging such as fine lines,dull skin and wrinkles on the surface of your skin or even deeper pigmentation.
This could result in pigment spots later down the road- all caused by UVA exposure from sunlight.
The best way to stay protected from the sun is with SPF. Use a sunscreen that has an SPF rating of 25 or higher. At least once every day, but also protect exposed areas like hands, face, neck, arms, chest, shoulders, back, abdomen stomach, sides thighs feet, etc.
It’s important to use good sunscreen, even on the most cloudy days.
Findbroad-spectrum sunscreen that has an ingredient like titanium dioxide or zinc oxide in it so you can block out those harmful rays and protect yourself from wrinkles as well.
While it’s important that you use an SPF lotion every day, remember to wear protective clothing when outdoors during the summer months, you should also wear protective clothing when outside.
Use an overshirt, hat, and sunglasses when you’re out in the sunlight for long periods of time – even on cloudy days! If your skin burns easily or turns red after being exposed to too much UV radiation then apply some hydrocortisone cream immediately.
This over-the-counter, fragrance-free, relieves itching associated with itch flare-ups due to minor skin irritations and will help with inflammation and reduce puffiness around affected areas.
Now we all know that prolonged sun exposure over a long period of time increases the risk of skin cancer so I`ll not go nore into why you should protect your skin when exposed to sunshine.
Avoid using harsh chemicals in your skin care routine
We all know the importance of avoiding harsh chemicals in our skincare routine, but what about those that are less obvious?
Avoid using any product with high concentrations or large amounts at once. A lot of people might be surprised to learn there is actually an ingredient called DBP found on many beauty products.
This could lead you towards developing acne breakouts from them over time because it’s such a pores-clogging compound!
Sometimes when you think of the most common skincare mistakes to avoid, what comes to mind are common things like removing your makeup.
But you need to be careful of the products you put on your skin.
If you’re interested in preventing wrinkles, it’s important to use natural ingredients, but I have to point out this is a personal choice.
This is why instead of always using harsh cleansers on my face, I prefer to use microdermabrasion to deep cleanse my face.
A good way to avoid this is by using natural, anti-aging ingredients that will help maintain healthy cells for a longer period of time without irritation or drying out too quickly and still protecting your skin barrier.
However, it must also be mentioned before jumping to any conclusions. Use gentle exfoliants to remove flaky skin as they are gentle and will not strip your skin of its natural oils.
These findings don’t mean everyone should go around slathering themselves with honey every day so take caution if trying something new for your skin health!
Using the Wrong Products
Skincare is not a one-size-fits-all treatment, and everyone has different needs and different skin problems.
What works for you may not work the same way someone else, to treat their skin type or concerns. Avoid the common skin care mistakes people make thinking that over prized skincare products gives you a perfect skin.
So be sure to research what products are best suited just for YOU!
Finding the right skincare can be an endless discussion with each person having their own idea of beauty in mind!
Let us help by giving some insight into the types of skincare products that might work best based on age category and skin type (or any other factor).
You may have acne or just have a dull-looking complexion due to dryness, without being oily enough caused by using the wrong type of products.
The best way to keep your skin hydrated and healthy is by using a hydrating lotion that will not only moisturize, but also feed the natural moisture in our bodies.
But instead of just moisturizers, drinking enough water will hydrate your skin as well as flush out toxins from your body and get you that radiant complexion.
Have you ever stopped to think about all the things that can make your skin dry? Things like hot weather, excessive exercise, or engaging in an intense hobby, dehydrated skin will only make your skin dull.
You may even apply moisturizer at night and not realize how much it’s absorbed into cloth on fabric before bedtime.
The best way for us humans who wear clothes every day is by taking care of both ourselves internally as well externally, maintaining good health starts from inside out. Go ahead and drink plenty of water for hydration.
One of the most common skincare mistakes to avoid and that most women make, not removing their makeup before bed.
Not only does it lead to break-outs in clogged pores but also leaves a woman’s face pouchy overnight which doesn’t look good for anyone!
Women often forget that even if you think your skin looks alright during daytime hours,by evening you need to freshen up and remove that makeup.
Sleeping in your makeup may cause premature aging as unremoved makeup only clog pores.
Sometimes little touches here and there can improve how an individual presents themselves both inside as well as outside.
But you don`t need that makeup when going to bed.
If you get too tired in the evenings, get alcohol-free waterproof Makeup remover towels to make removing makeup easy this gentle cleanser works well and removes all makeup residue from your skin.
You may have heard that removing your makeup before bed is a good way to start the day fresh. But, you should never remove any face or body product and go straight into sleep without washing it off first.
Not even if they’re oil-based! This can lead to breakouts from clogged pores since we already know how much dirt gets stuck in there long
A better idea would be cleansing with an astringent wipe then moisturizing right away so nothing goes untreated for too long…and who doesn’t want glowing skin?You achieve this by making a good skincare routine and follow it.
Trying to complete a list of the most common skincare mistakes is almost impossible in one post,but I hope this post will help you have a healthy complexion and a radiant skin through safe consistent skincare routine.
Whilee taking care of your skin,remember to get enough sleep,there is no substitution for this.Also make a habit of using Vitamin C as it works wonders on age spots.
I hope you will find the right spot treatments and reach your skincare goals,that you are happy with.
We use cookies on our website to give you the most relevant experience by remembering your preferences and repeat visits. By clicking “Accept All”, you consent to the use of ALL the cookies. However, you may visit "Cookie Settings" to provide a controlled consent.
This website uses cookies to improve your experience while you navigate through the website. Out of these, the cookies that are categorized as necessary are stored on your browser as they are essential for the working of basic functionalities of the website. We also use third-party cookies that help us analyze and understand how you use this website. These cookies will be stored in your browser only with your consent. You also have the option to opt-out of these cookies. But opting out of some of these cookies may affect your browsing experience.
Necessary cookies are absolutely essential for the website to function properly. These cookies ensure basic functionalities and security features of the website, anonymously.
Cookie
Duration
Description
cookielawinfo-checkbox-analytics
11 months
This cookie is set by GDPR Cookie Consent plugin. The cookie is used to store the user consent for the cookies in the category "Analytics".
cookielawinfo-checkbox-functional
11 months
The cookie is set by GDPR cookie consent to record the user consent for the cookies in the category "Functional".
cookielawinfo-checkbox-necessary
11 months
This cookie is set by GDPR Cookie Consent plugin. The cookies is used to store the user consent for the cookies in the category "Necessary".
cookielawinfo-checkbox-others
11 months
This cookie is set by GDPR Cookie Consent plugin. The cookie is used to store the user consent for the cookies in the category "Other.
cookielawinfo-checkbox-performance
11 months
This cookie is set by GDPR Cookie Consent plugin. The cookie is used to store the user consent for the cookies in the category "Performance".
viewed_cookie_policy
11 months
The cookie is set by the GDPR Cookie Consent plugin and is used to store whether or not user has consented to the use of cookies. It does not store any personal data.
Functional cookies help to perform certain functionalities like sharing the content of the website on social media platforms, collect feedbacks, and other third-party features.
Performance cookies are used to understand and analyze the key performance indexes of the website which helps in delivering a better user experience for the visitors.
Analytical cookies are used to understand how visitors interact with the website. These cookies help provide information on metrics the number of visitors, bounce rate, traffic source, etc.
Advertisement cookies are used to provide visitors with relevant ads and marketing campaigns. These cookies track visitors across websites and collect information to provide customized ads.